
What is it?
A Contact Property is a persistent value that lives on the Contact. An example is their email, their name, their date of birth, or even anything custom—say their favorite flavor of Coke.How do I use it?
- Step 1: Navigate to the Properties
- Step 2: Create a Property
- Step 3: Add the Property to your Card
- Step 4: View the Property on Contacts
Step 1: Navigate to the Properties
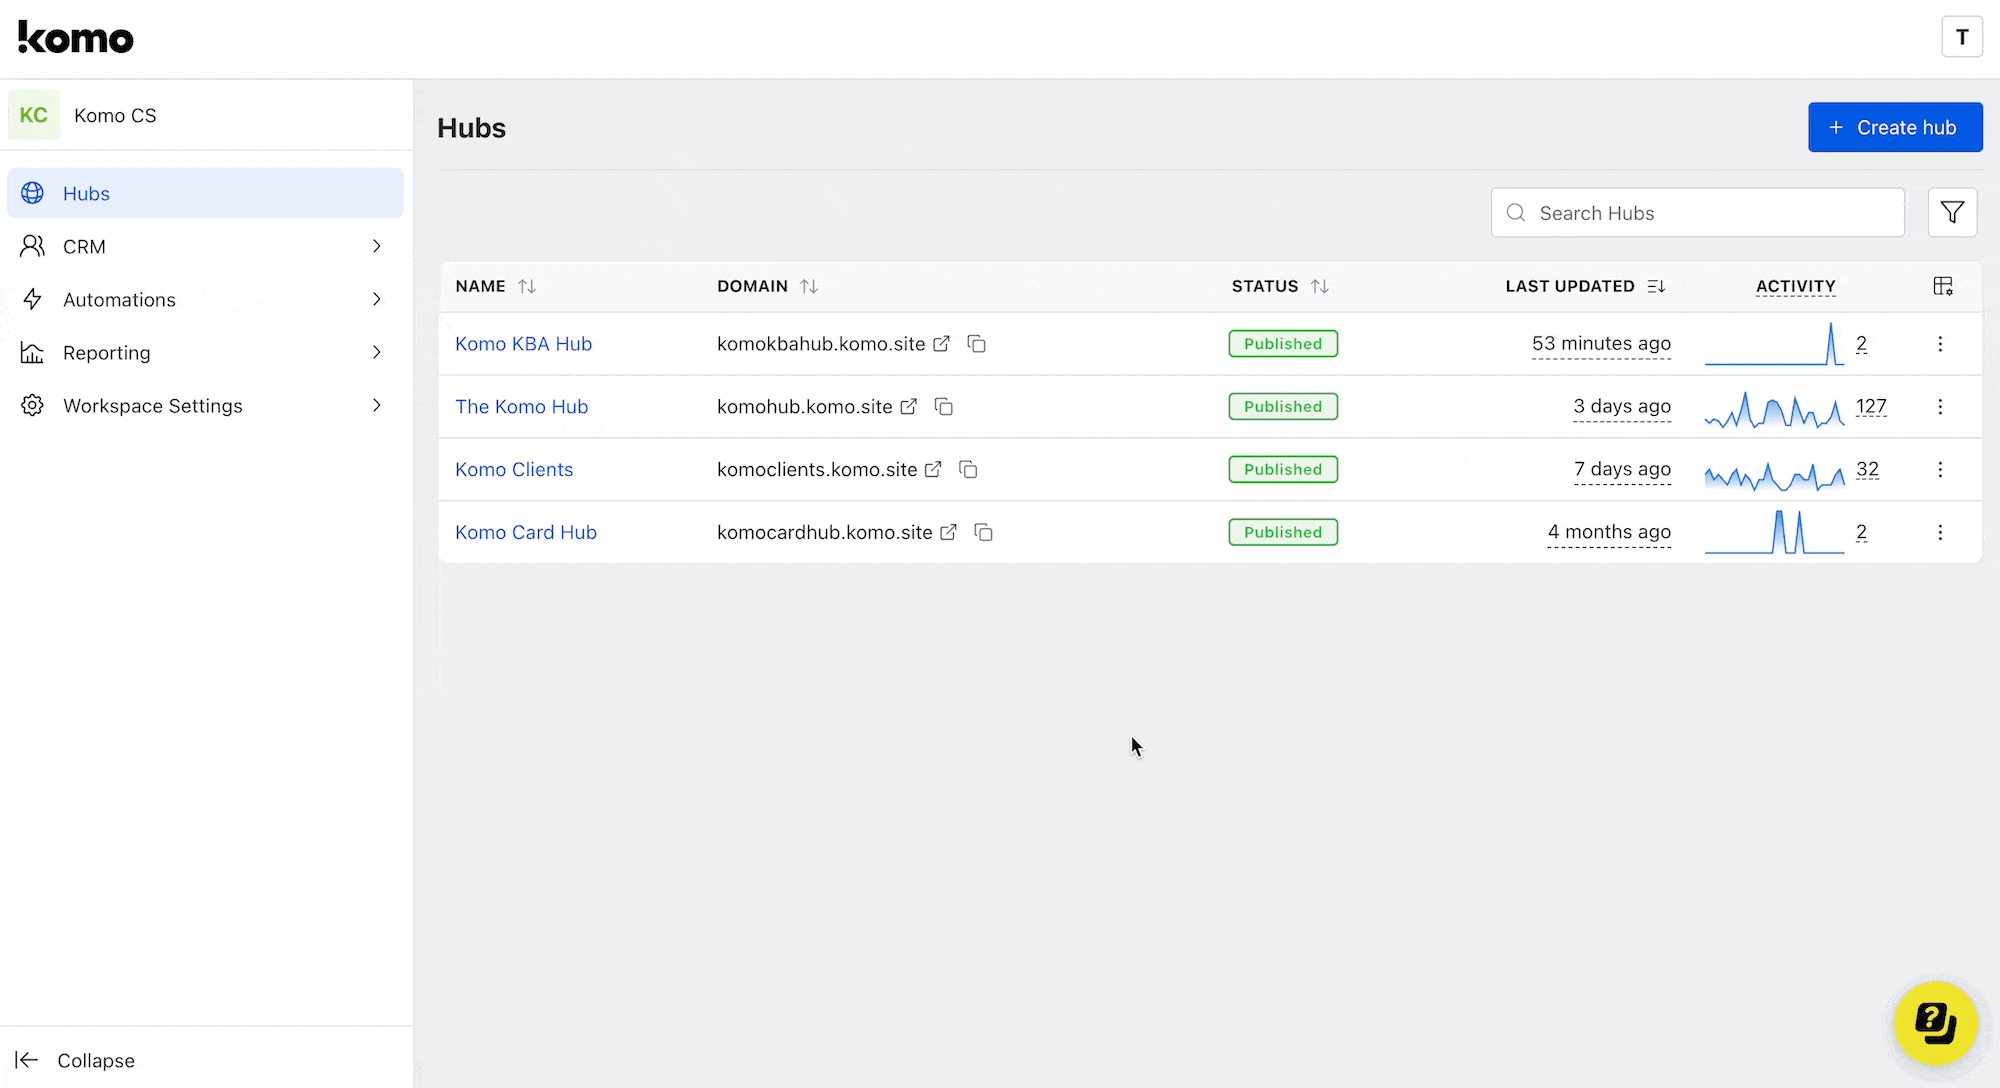
- Click on CRM on the left side-bar.
- Head to the Properties tab to create your contact properties.
Step 2: Create a Property
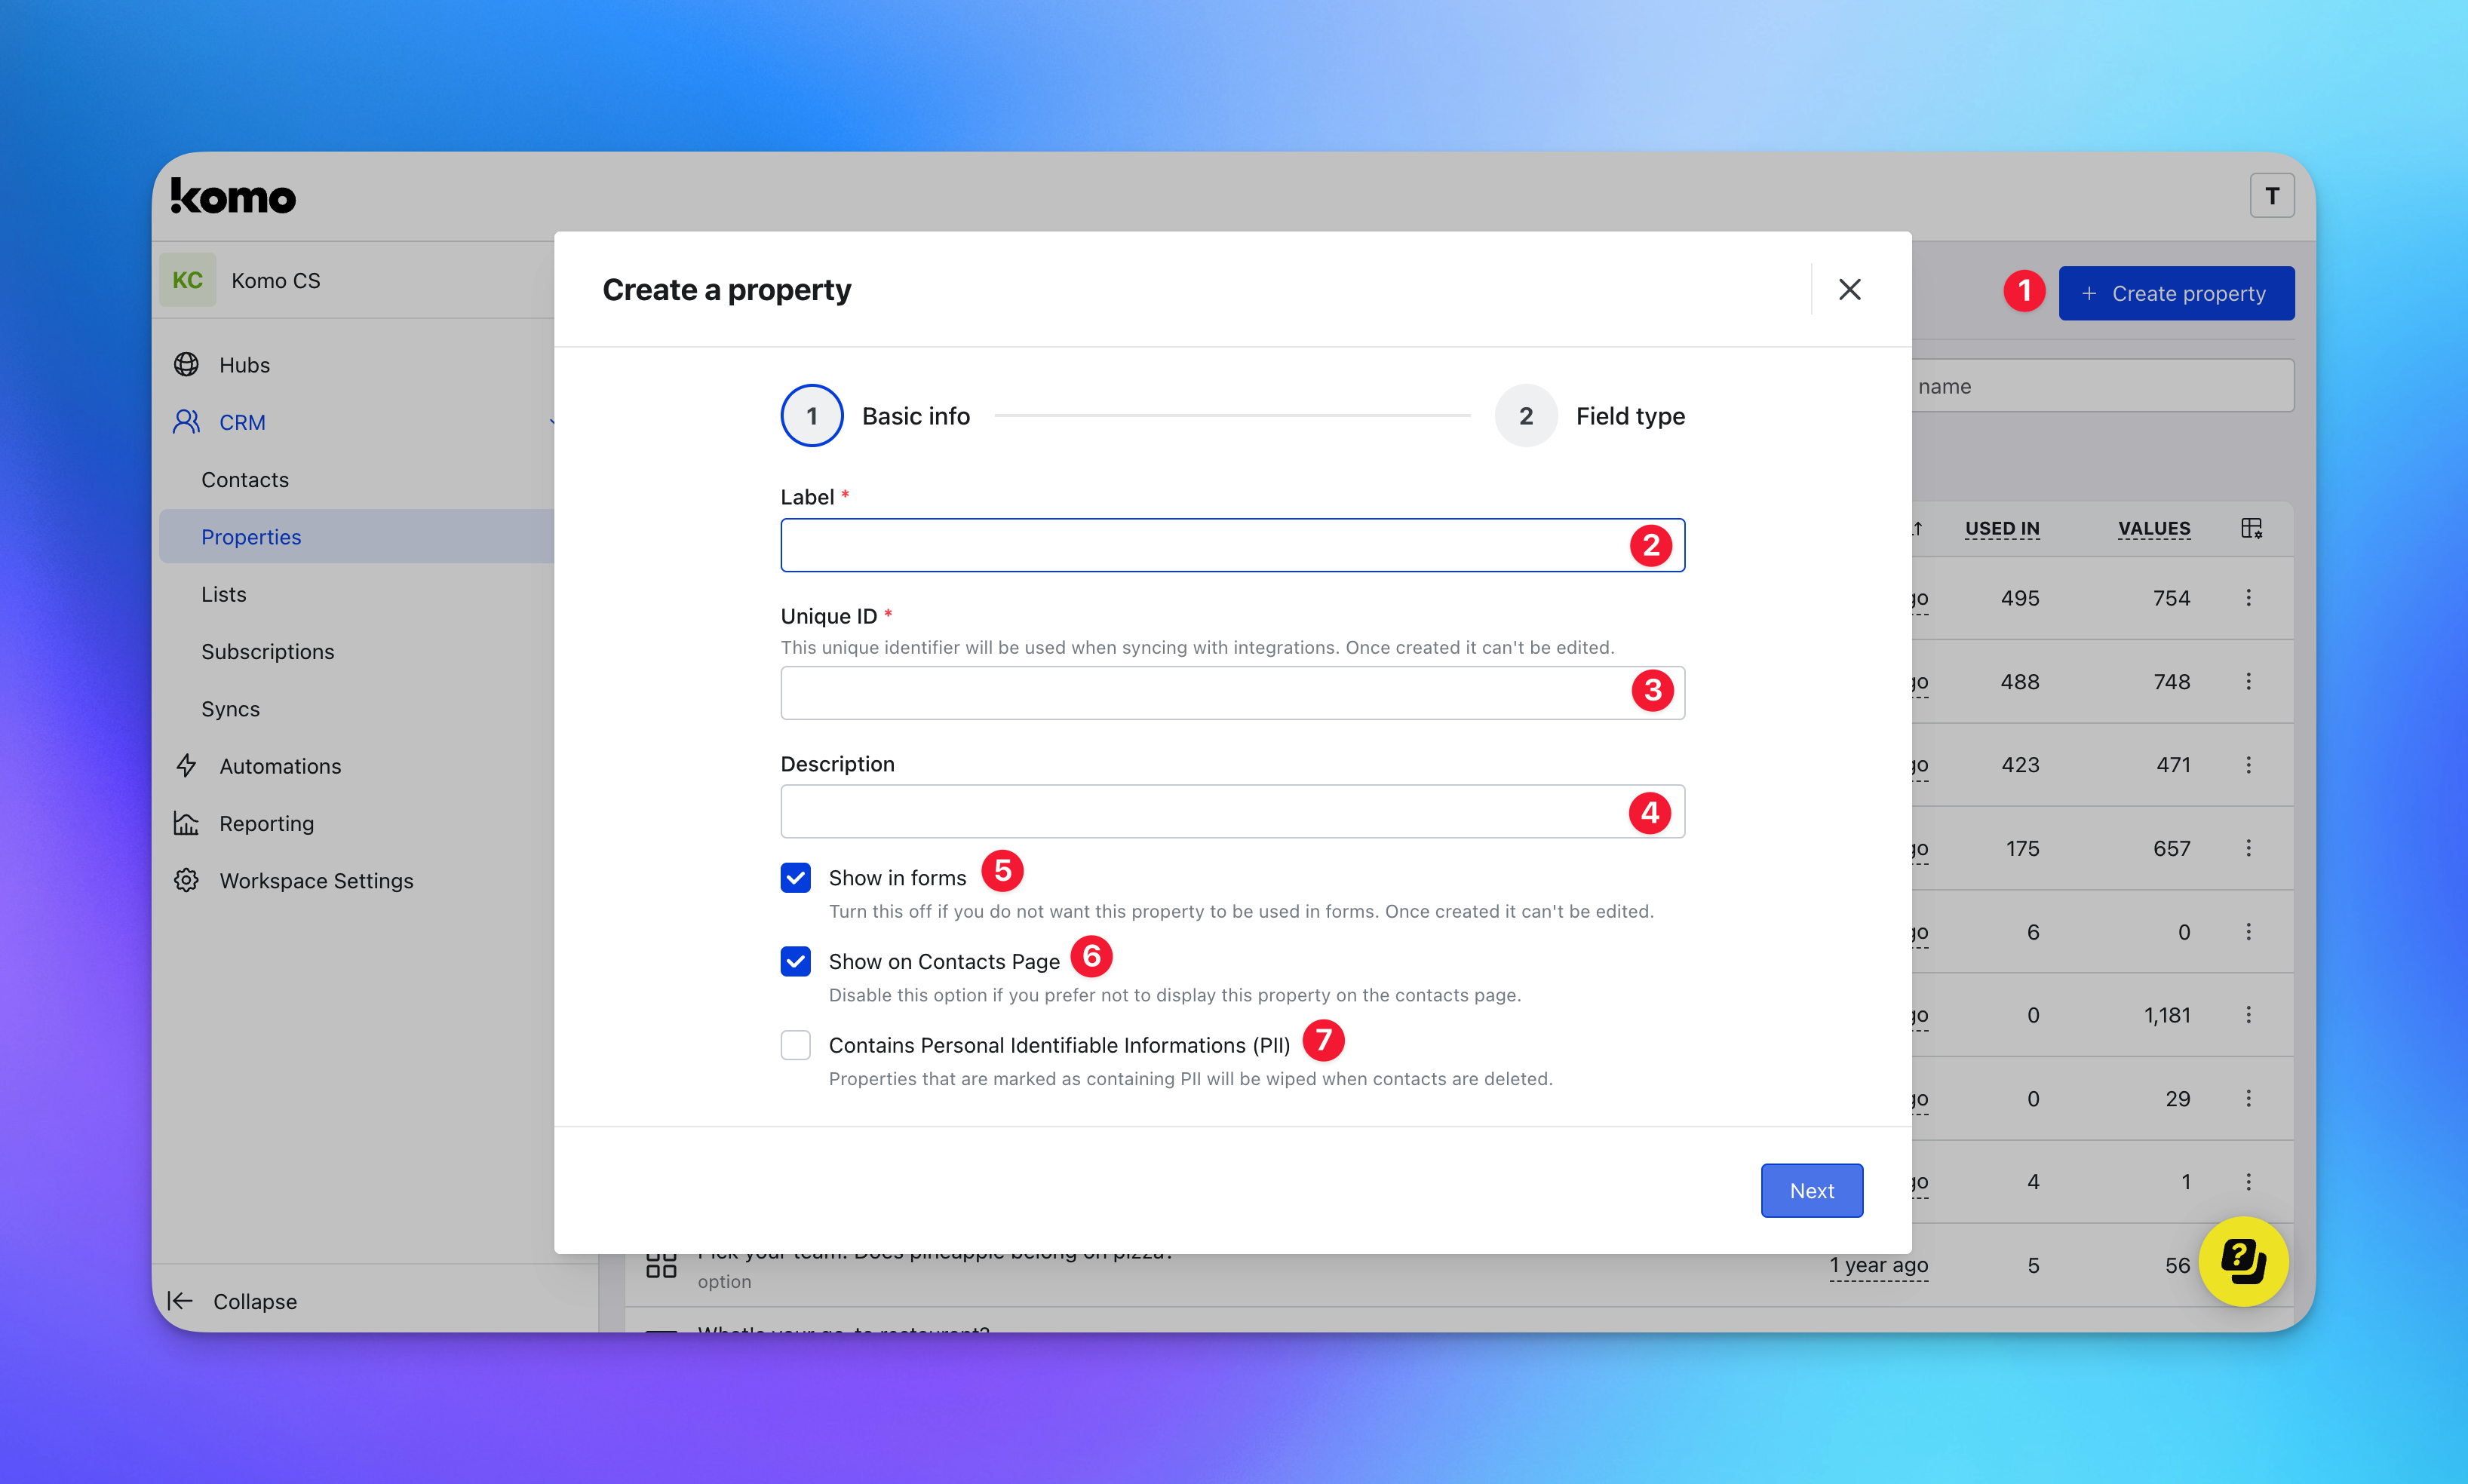
- (1) Click on Create property.
- (2) Give your new Contact Property a Label. This will be the label that appears on any forms with this property, as well as the label of this property on your Contacts table.
- (3) Give the Contact Property a unique identifier.
- (4) Give your Contact Property an internal description.
- (5) Choose if you would like this property to be available to add to your Data Capture forms.
- (6) You have the option to not display this property on a contact profile
-
(7) Enabling the property as PII means all information collected from this property will be removed when a contact is deleted.
Contact Property Field Type
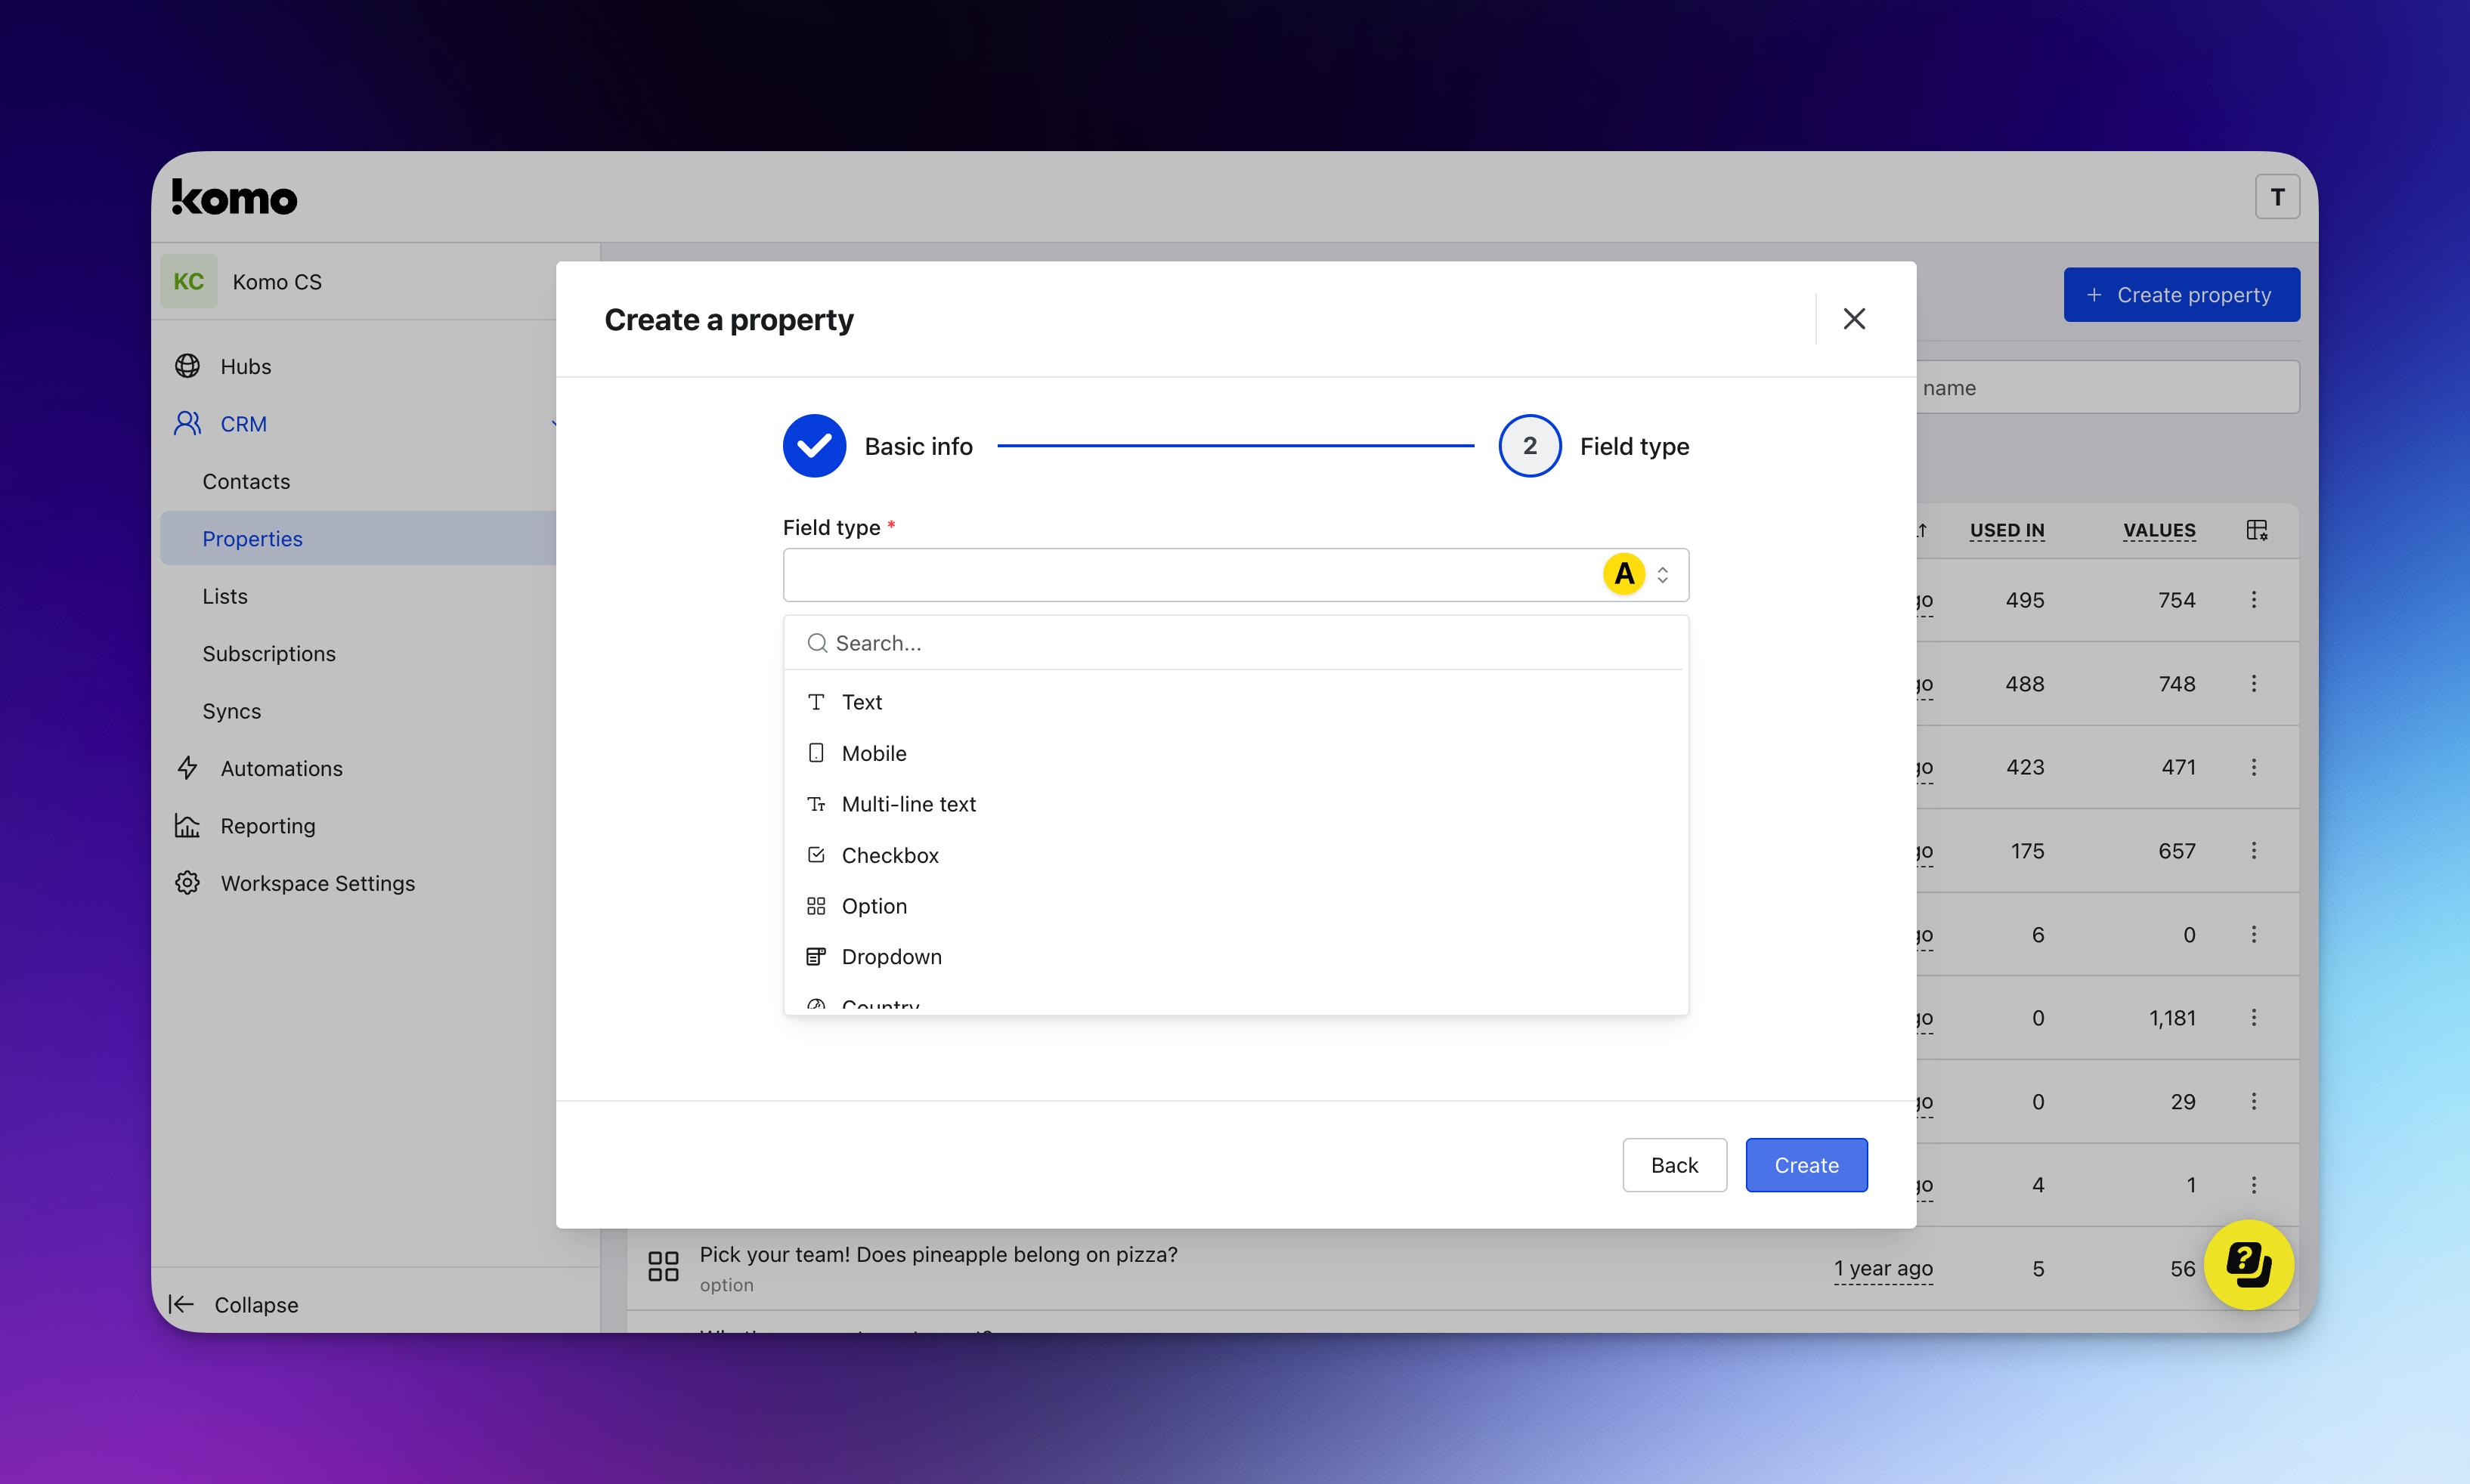
- (A) Select your field type from the dropdown menu. This can be text input, option, dropdown, country, number, date, birthday, etc., then click Create.
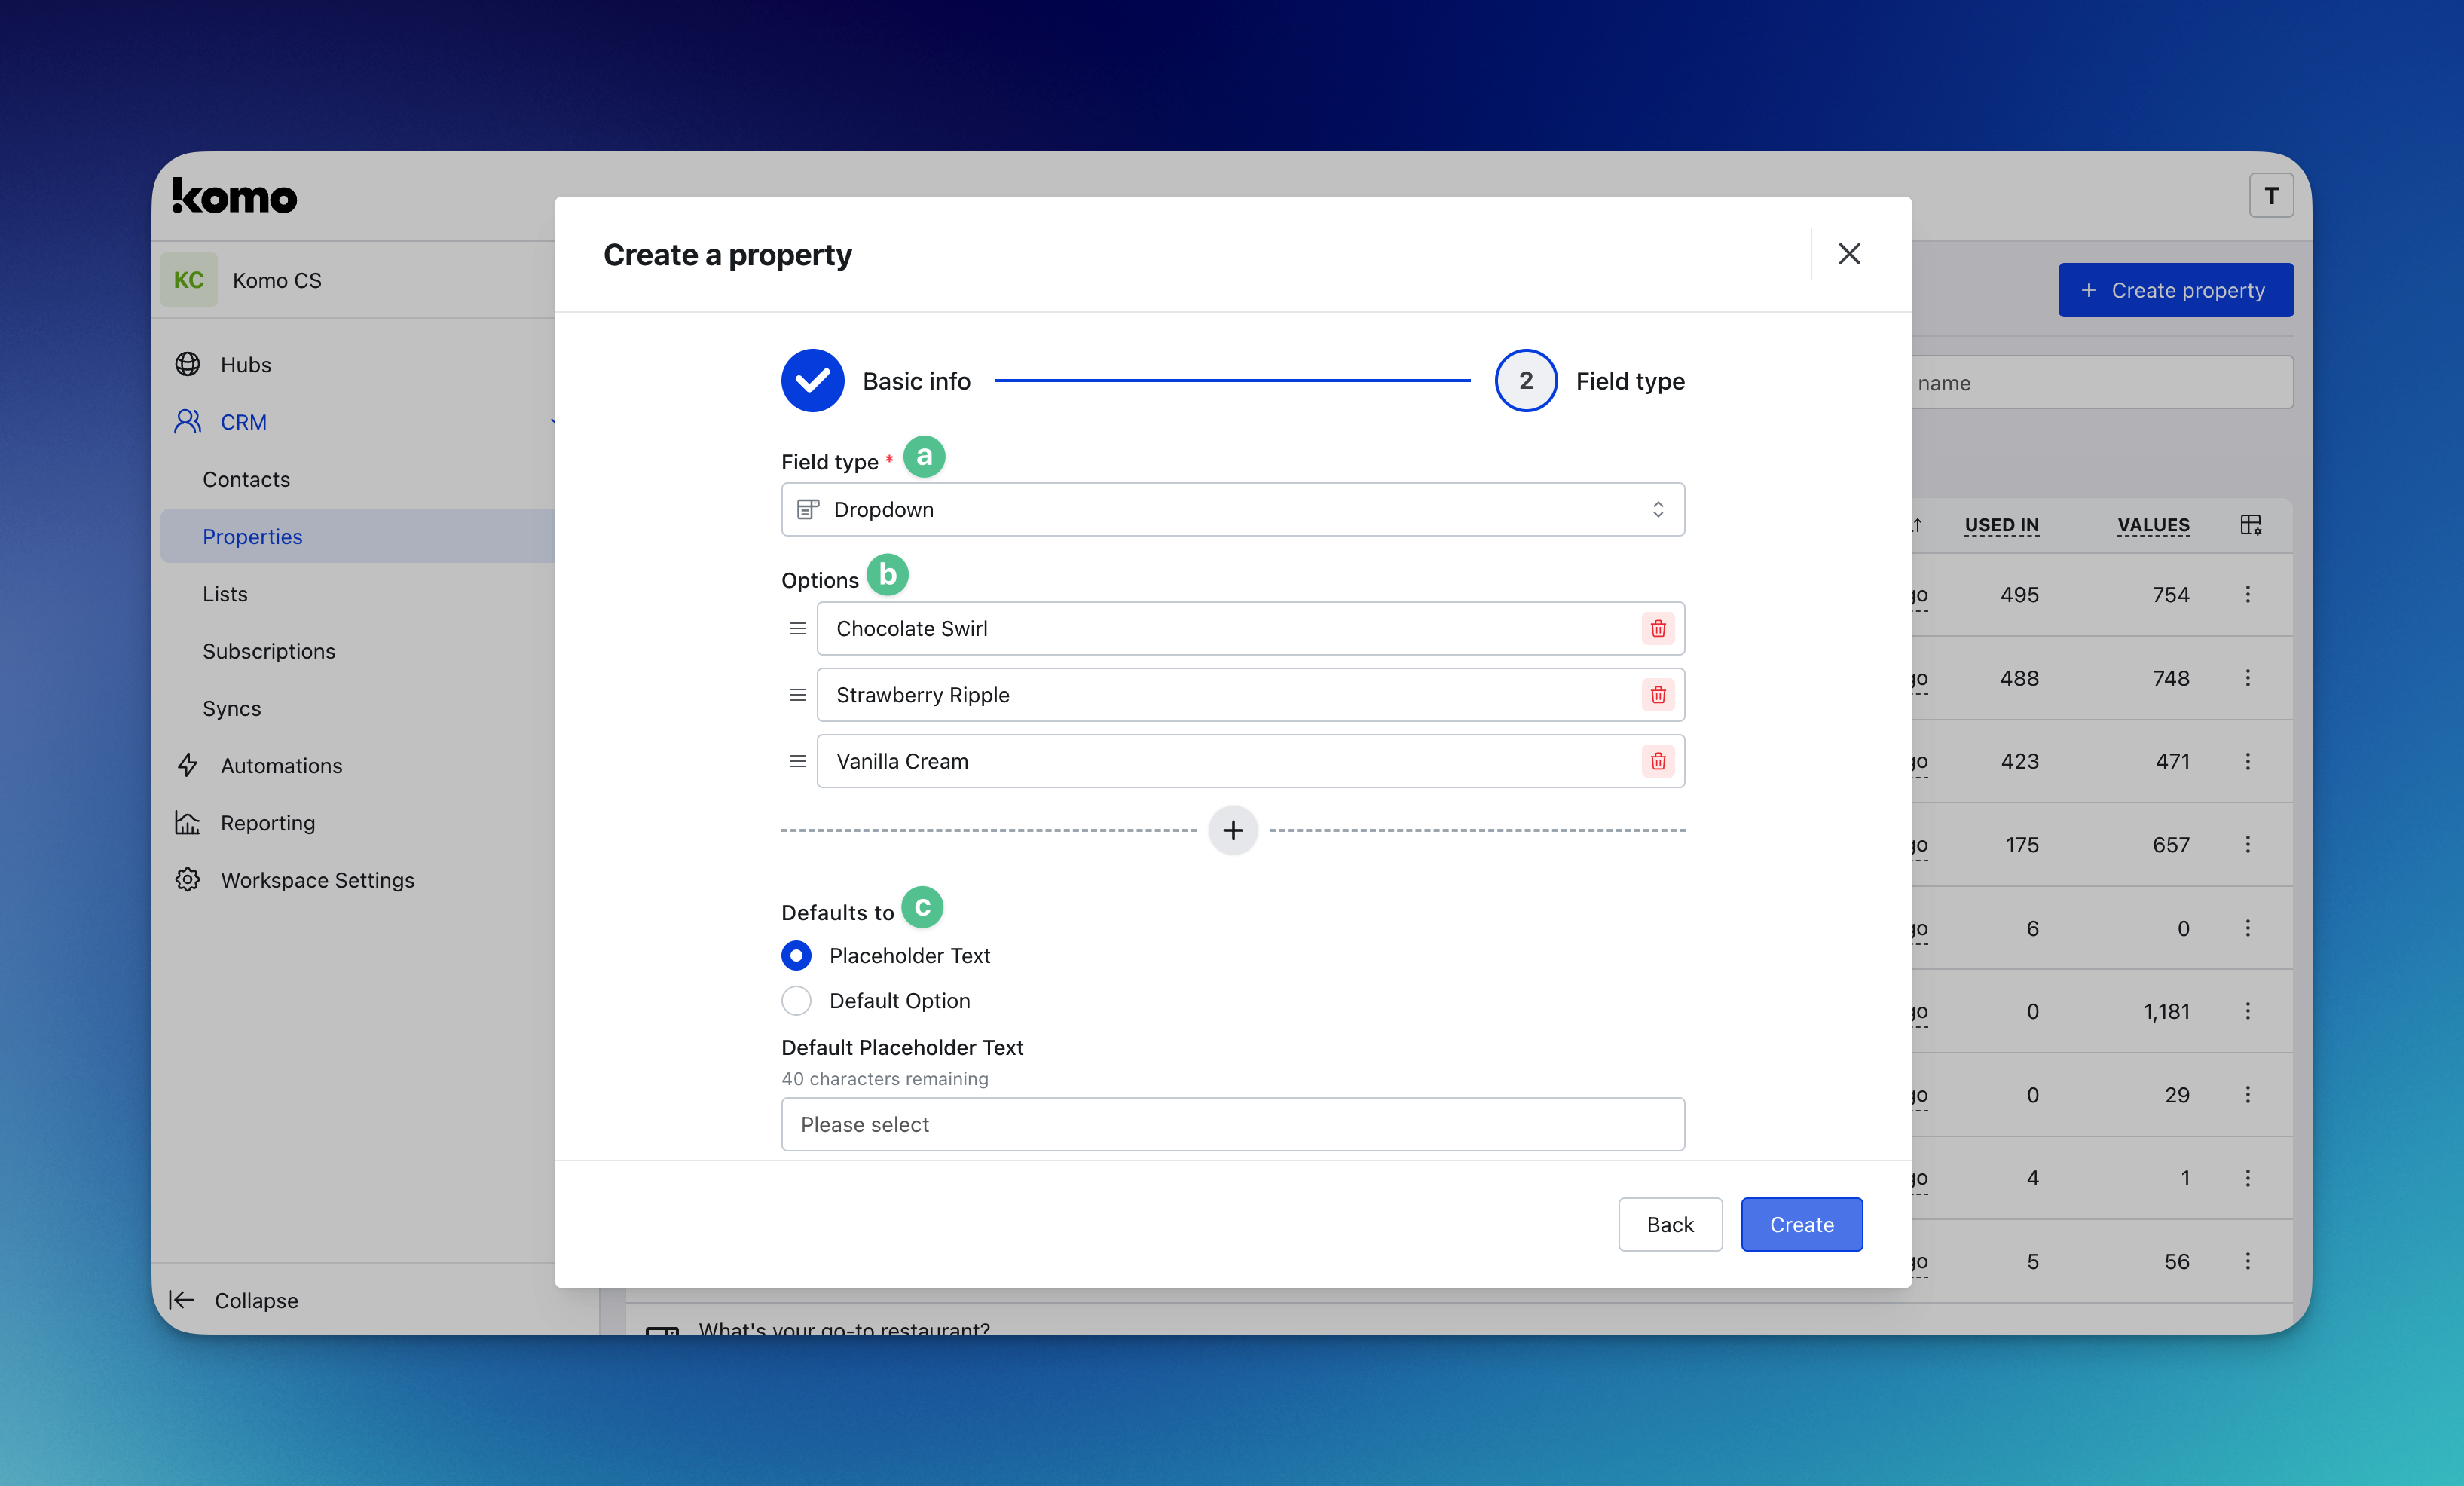
- (A) You can update the field type here.
- (B) Depending on your selection, fill in the relevant details if applicable.
- (C) Choose your default option - This is either the default placeholder text or a default option based on your field type.
- (A) Select your field type from the dropdown menu. This can be text input, option, dropdown, country, number, date, birthday, etc., then click Create.
Step 3: Add the Property to your Card
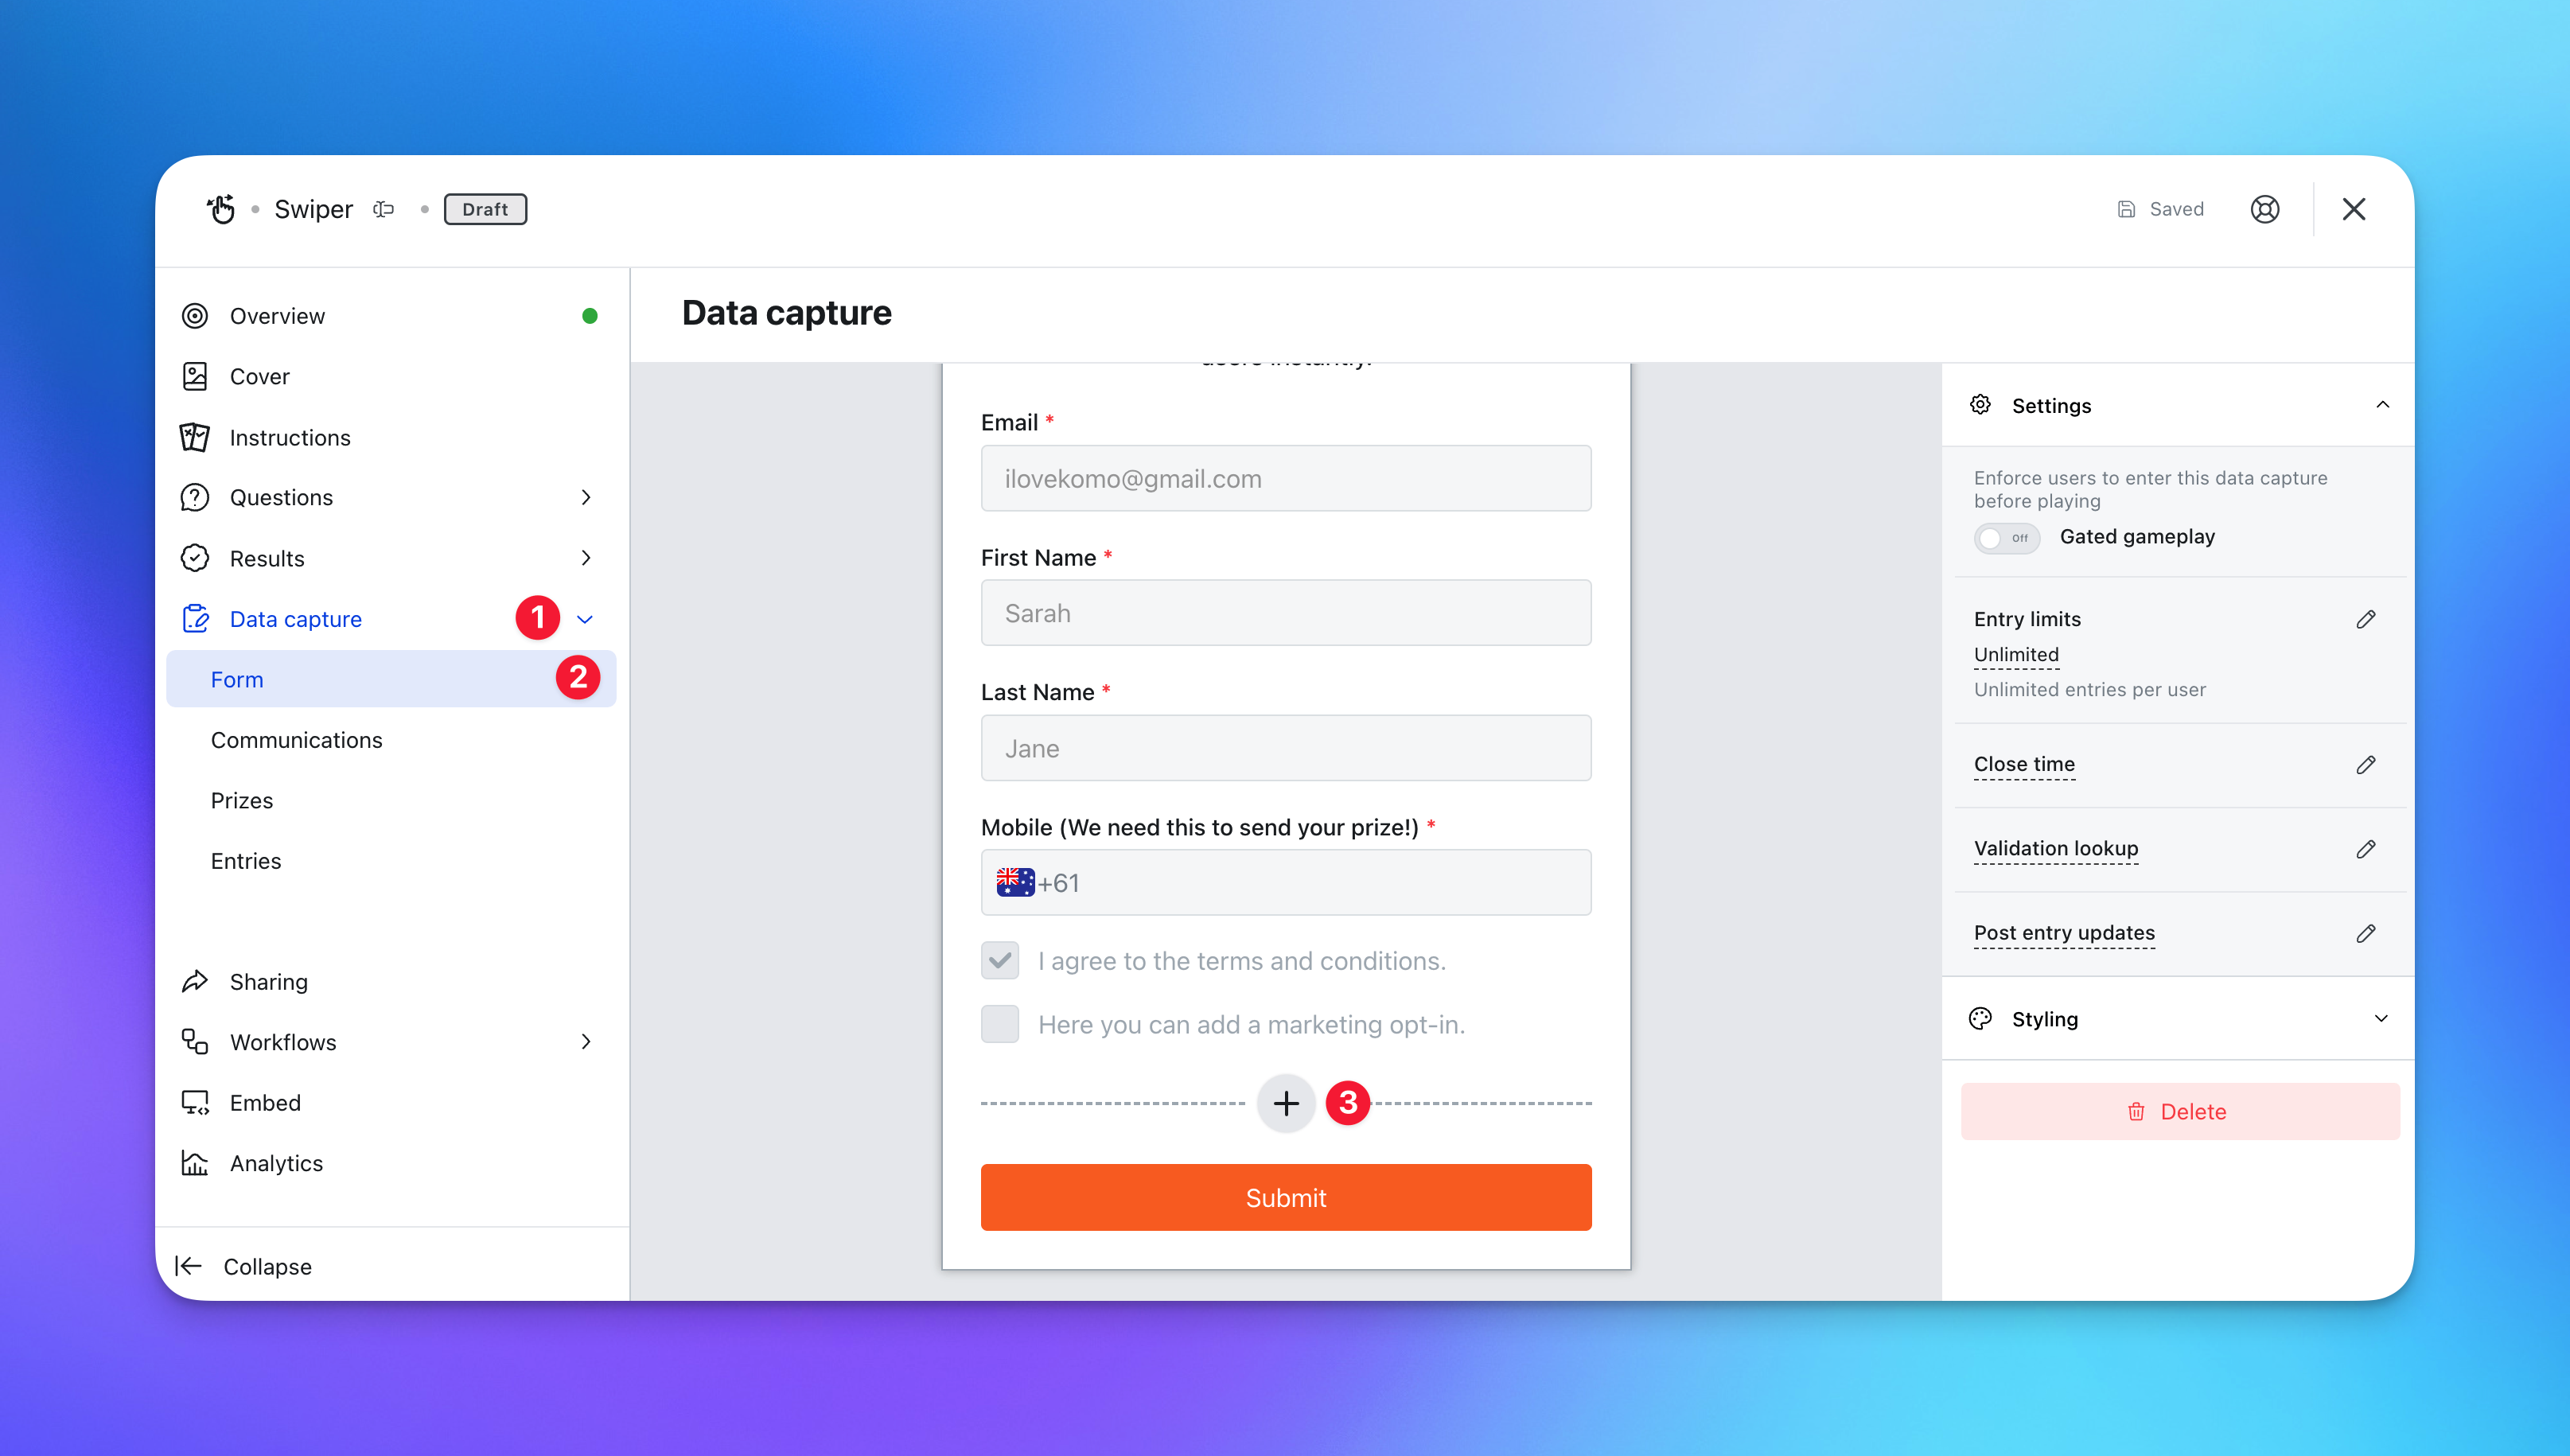
- Navigate to your Engagement Hub.
- Go to the card you want to apply the property to.
- (1) Click on Data capture.
-
(2) Then go to Form.
Follow the steps in this article to learn how to set up Data Capture.
-
(3) Add the property by clicking on the plus icon on the form.
Adding Form Elements
.png)
- (A) Here you will find the Contact Property you created in Step 2. Click on any property to continue.
.png)
- (A) Choose whether you wish for this field to be required.
- (B) Here you can update the label name for the property.
- (C) Select what is presented on the field - placeholder text or a default option then click Add.
- (A) Here you will find the Contact Property you created in Step 2. Click on any property to continue.
Step 4: View the Property on Contacts
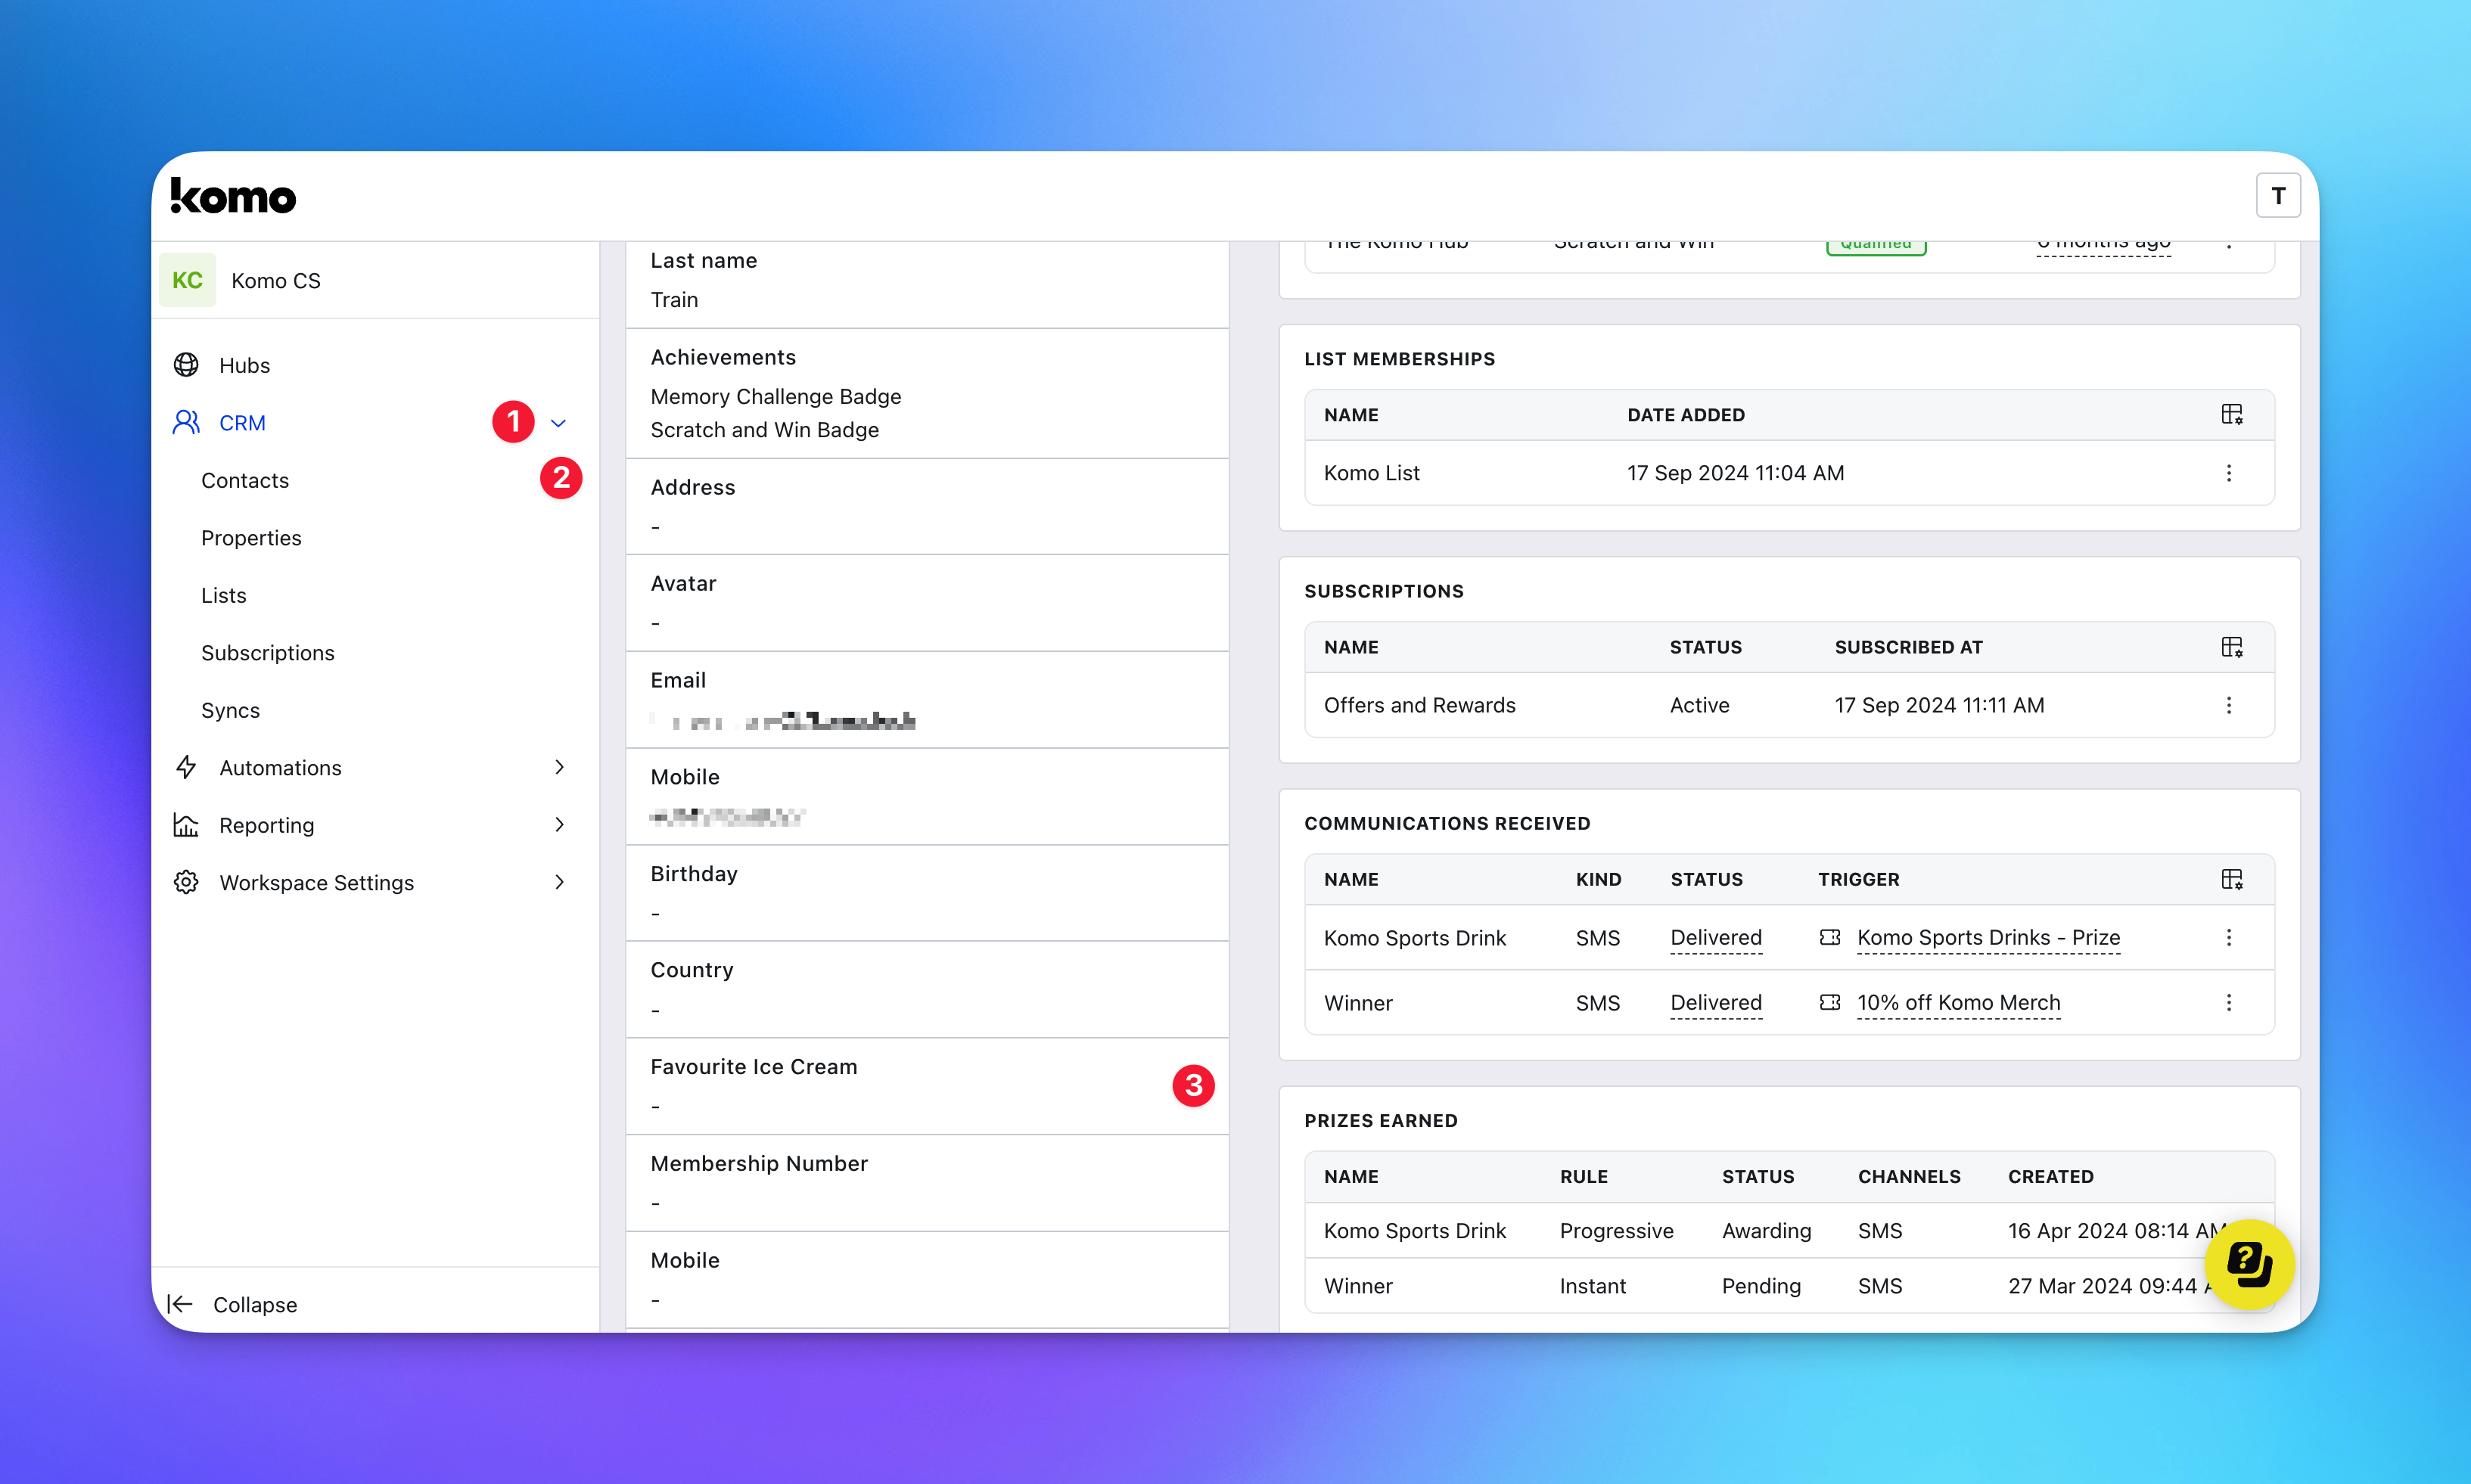
- (1) Navigate to contacts by clicking on CRM.
- (2) Click on Contacts and click on a contact to view their profile.
- (3) Under the About this contact section, you can see the responses to all the contact properties created.